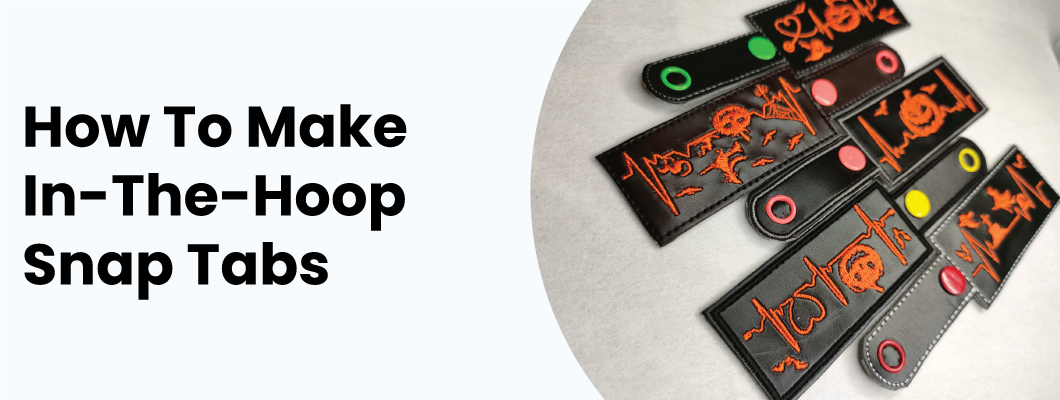
A Snap Tab is a little decorative embroidery design stitched in the hoop with a plastic snap or button attachment at the end to create a loop for hanging. These snap tabs are normally attached to keychains, backpacks, zippers, and other stuff for additional decorations and fun.
The word "snap" refers to the plastic snap fastener that is joined to the embroidered pattern and makes it simple to attach it to various objects or accessories.
Learn how to create your own charming Snap Tabs with unique designs that reflect your personal style or seasonal themes. These little creations can be made entirely in the hoop with embroidered embellishments. We will guide you through the process step-by-step .
Supplies:
- Small pieces of Fabric; Vinyl, cotton, felt, twill, etc.
- Embroidery thread
- Cutaway/Tear-away Stabilizer
- Adhesive Spray / Tape / Pins
- Scissors
- Plastic Snaps
- Iron
- Desired Embroidery File
Preparation:
- Cut a Stabilizer slightly larger than your hoop.
- Cut 2 Pieces of Vinyl/Fabric of the same size that is larger than your design's size.
- Download and Load your embroidery files on your machine.
- Select the colors of your Embroidery Threads
.jpg)
The Process Begins:
Step 1: Takedown Stitch your Fabric's Front
Hoop your stabilizer, ensuring it's taut and secure in the embroidery hoop, then start a Takedown stitch, your machine will stop once it finishes the Takedown, if not please stop it immediately.
.jpg)
.jpg)
Step 2: Fabric Placement for the Front
Once the machine stops, take out your hoop and place the first piece of vinyl with adhesive spray/pins/tape.
Step 3: Embroider Your Design
Start embroidering your design. After finishing, take out the hoop and carefully trim any excess thread from the front and back of your snap tab.
.jpg)
.jpg)
Step 4: Fabric Placement for the Back
Place your second piece of vinyl on the back of your hoop with adhesive spray/pins/tape.
.jpg)
Step 5: Takedown Stitch your Fabric's Back
Start your machine again and finish the Final Takedown stitch which will hold the back of the design.
.jpg)
.jpg)
Step 6: Run the Thick outline - (Optional - you can Skip this Step)
If you love a thick outline for your tab, we have an optional extra file included in zip of the snap tab designs. Use the extra file to make a thick outline after step 5.
.jpg)
Step 7: Remove & Cut
Gently take out your fabric from the hoop. Cut the excess fabric around the embroidered design to achieve your desired snap tab shape. Be careful not to damage the stitches.
.jpg)
.jpg)
Step 8: Fold and Attach the Snap:
Follow the instructions for attaching the plastic snap to your snap tab. This typically involves folding the snap tab in half and using the snap-setting tools to secure the snap in place.
Step 9: Iron your Snap Tab
Use an iron to press your snap tab if needed. Be cautious when ironing over any embroidery, use a pressing cloth to protect the stitches.
Step 10: Attach and Have fun!
Your embroidered Snap Tab is now ready to use. You can attach it to keyrings, bags, zippers, or other items as you want. Have fun!





-250x250.png)













Leave a Comment